A modern kitchen should look calm, but it must also work hard. The route from refrigerator to sink should feel natural. Drawers should open without hitting an island. And the lamp above the counter should illuminate actual food preparation, not just polished stone.
How To Design A Modern Kitchen Space begins with these everyday moments, not a color trend. Houzz’s 2024 U.S. Kitchen Trends Study reported a $55,000 median spend for major kitchen remodels completed in 2023, up from $50,000 in 2022. That figure is not a budget recommendation; it is a reminder that design decisions have real costs. Measure carefully, prioritize what you use, and leave room for surprises. Even a good plan can miss something.
Details matter. Architect and designer Charles Eames put it this way: “The details are not the details. They make the design.” In a kitchen, that can mean a well-placed outlet, a drawer organizer, or a finish that is easy to clean. Lighting deserves the same attention: ENERGY STAR says LED bulbs use at least 75 percent less energy than incandescent bulbs and can last up to 25 times longer. Still, efficiency alone will not make a room feel welcoming. Texture, daylight, and a comfortable place to pause matter too. The best modern kitchen is not perfect on paper. It is thoughtful in daily use—and honest about the compromises behind its clean lines.
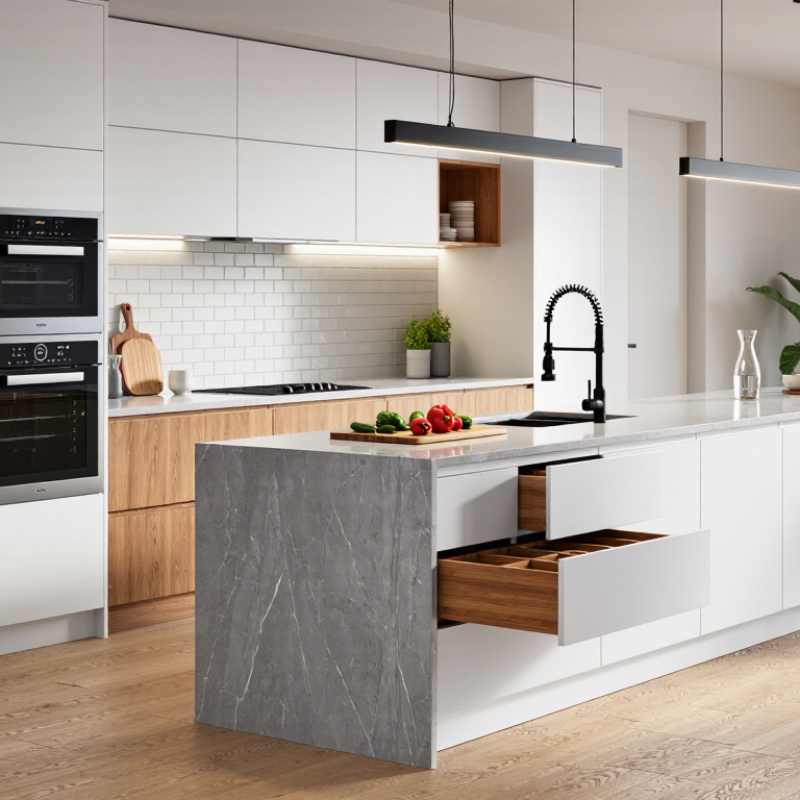
Plan the sink, cooktop, and refrigerator as the three points of a working triangle. A widely used NKBA planning guideline keeps each leg between 4 and 9 feet, with all three legs totaling no more than 26 feet. Measure between the centers of the appliances, not their outer edges. Keep the route clear of tall cabinets and island corners. A refrigerator door that opens into the main path can disrupt an otherwise sensible layout.
Picture carrying a pot from the sink to the cooktop, then reaching the refrigerator for vegetables. The route should feel direct, with enough counter space beside each work area for setting things down. In a narrow kitchen, a peninsula may squeeze the triangle; in a large room, distant appliances can make it feel like a hike. A floor plan can look perfect and still feel awkward once cabinet doors swing open. Check clearances with taped outlines before construction. The 26-foot limit is a planning guide, not a substitute for testing how people actually move through the room.
A kitchen work aisle needs enough room for people to move and work without bumping elbows. NKBA planning guidance recommends 42 inches between countertops for one cook, and 48 inches when two cooks share the space. Measure from counter edge to counter edge, rather than from cabinet faces. Those few inches matter when someone is chopping vegetables while another reaches for a drawer.
Treat these dimensions as planning guidance, not a guarantee that every kitchen will feel comfortable. A dishwasher door or oven door can occupy much of the aisle when open. Try marking the proposed width on the floor with painter’s tape, then walk through with a chair or laundry basket nearby. It may feel different than it looks on paper. That is useful to notice early.
For two cooks, the extra six inches can help one person pass while the other works at the sink. In a narrow room, though, widening the aisle may reduce space for cabinets or seating. Check the layout with appliances open and consider where handles, corners, and traffic paths meet. Confirm current recommendations and local requirements with a qualified kitchen designer or building professional. A small pinch point can become an everyday annoyance.
Landing space is the clear countertop beside an appliance where hot pans, groceries, or dishes can rest. NKBA planning guidance commonly recommends at least 24 inches on one side of a sink and 18 inches on the other. For a cooktop, allow 12 inches on one side and 15 inches on the other. Keep these areas continuous when possible; a narrow strip interrupted by a tall cabinet is less useful than its measurement suggests.
At a refrigerator, plan for 15 inches of counter on the handle side, or on either side of a side-by-side model. If that is impractical, a landing surface across from it may work when it is within 48 inches. An oven also benefits from a nearby 15-inch landing area. Measure it twice. A drawing can look generous, then lose useful space to a deep handle, wall trim, or an open appliance door. I’d check the actual door swing and set a mixing bowl or baking sheet on the proposed counter before finalizing the layout. These dimensions are planning guidance, not a guarantee of comfort; verify current NKBA recommendations and applicable local requirements. Even a careful plan can feel cramped during a busy meal.
NKBA guidance recommends landing areas of 24 inches and 18 inches beside a sink, and 15 inches and 12 inches beside a cooking surface. For a refrigerator, plan for a 15-inch landing area at an accepted location, such as beside the refrigerator or across from it.
Layer task lighting to reach roughly 50 foot-candles on kitchen counters, a practical target in Illuminating Engineering Society guidance for countertop work. One foot-candle measures light falling on a surface. Check the counter itself, not the brightness of the ceiling fixture. A small meter can reveal dim spots beside the sink or beneath deep cabinets. No meter? Treat that as a limitation, not a reason to guess confidently.
Combine recessed ambient lights with under-cabinet fixtures aimed toward the backsplash and worktop. Keep the light source shielded where possible; bare LEDs can create glare on glossy stone. The U.S. Department of Energy’s Energy Saver guidance notes that LED bulbs use at least 75 percent less energy than incandescent bulbs. Efficient sources make longer task-lighting hours easier to manage, but they do not guarantee even coverage. Move a cutting board around and watch for hand shadows. That simple test is imperfect. Still, it often shows where another fixture or a better beam angle would help.
Cite: Illuminating Engineering Society, residential lighting guidance; U.S. Department of Energy, Energy Saver, “LED Lighting.”
A modern kitchen should save water without making rinsing feel like a chore. The EPA WaterSense specification sets a 1.5-gallon-per-minute limit for labeled bathroom sink faucets, not kitchen faucets. That distinction matters: a kitchen faucet may need stronger flow for filling a stockpot or washing a muddy pan. For prep sinks or nearby bathroom fixtures, look for WaterSense-labeled models; for the main kitchen sink, check the measured flow rate and whether an aerator is compatible.
The EPA reports that replacing an inefficient bathroom faucet with a WaterSense-labeled model can save an average family about 700 gallons of water annually. Small change. In a kitchen, a well-designed spray pattern can also reduce time spent rinsing, though low flow alone does not guarantee convenience. Test the handle reach and spray controls if possible. A tall spout looks clean, but it can splash against a shallow basin. I would resist choosing the lowest flow rate just for a number; real households need fixtures that work with their dishes, water pressure, and habits. EPA WaterSense faucet specifications and savings estimates provide a useful benchmark, but kitchen-specific performance deserves its own check.
| Fixture or comparison | Flow rate at 60 psi | Standard or labeling status | Design takeaway |
|---|---|---|---|
| Kitchen faucet: federal maximum | 2.2 gallons per minute (gpm) | U.S. federal maximum for covered kitchen faucets | Use this as a reference point when comparing faucet specifications. |
| Water-efficient kitchen faucet | About 1.5–1.8 gpm | Voluntary efficiency target; EPA WaterSense does not certify kitchen faucets to the 1.5-gpm lavatory-faucet specification. | Check the rated flow and choose a spray pattern suited to everyday kitchen tasks. |
| Bathroom lavatory faucet | No more than 1.5 gpm | EPA WaterSense specification for labeled bathroom sink faucets | The 1.5-gpm WaterSense benchmark applies to bathroom lavatory faucets, not kitchen faucets. |
| Illustrative flow reduction | 2.2 gpm compared with 1.5 gpm | Difference: 0.7 gpm, or about 32% lower flow while water is running | Actual water savings depend on how long and how often the faucet is used. |
| Example daily-use estimate | 5 minutes of flow per day | At 2.2 versus 1.5 gpm: about 3.5 gallons saved per day | That is approximately 1,278 gallons per year, assuming the same five minutes of daily use. |
Flow rates are measured in gallons per minute (gpm). The annual estimate is illustrative and assumes a constant flow rate and five minutes of faucet use each day.
Keep each distance between the sink, cooktop, and refrigerator between 4 and 9 feet. Together, the three distances should not exceed 26 feet. Measure between appliance centers.
Picture carrying a pot from the sink to the cooktop, then reaching the refrigerator. Keep the route clear of tall cabinets and island corners. Try taped outlines before construction. Doors can change everything.
Aim for roughly 50 foot-candles on the counter surface. Check the worktop, not just the ceiling fixture. A small light meter can reveal dim areas.
Combine general lighting with under-cabinet fixtures aimed at the backsplash and counter. Move a cutting board around and watch for hand shadows. The test is imperfect, but useful.
That limit applies to labeled bathroom sink faucets, not kitchen faucets. Check a kitchen faucet’s measured flow and compatibility with an aerator. A stockpot needs room to fill.
Check the handle reach, spray controls, and basin depth. A tall spout may splash in a shallow sink. The lowest flow rate is not always the best fit.
A labeled, efficient bathroom faucet can save an average family about 700 gallons annually, according to published estimates. Kitchen savings depend on fixture performance and household habits. Small change.
No. Efficient bulbs can use much less energy, but they may still leave dim spots beneath deep cabinets. Check the light where you chop and wash.
How To Design A Modern Kitchen Space begins with a practical layout that keeps cooking, cleaning, and food preparation connected. Arrange the main work zones so the combined travel distance follows the 26-foot maximum for the work triangle, while keeping walkways comfortable: allow about 42 inches for one cook and 48 inches when two people share the kitchen. These clearances help reduce congestion and make everyday tasks easier.
Position appliances with usable landing areas nearby, giving you room to set down ingredients, dishes, and hot cookware safely. Combine general illumination with focused task lighting over counters, aiming for roughly 50 foot-candles where detailed work takes place. Complete the design with water-efficient fixtures that use no more than 1.5 gallons per minute. Together, thoughtful circulation, convenient surfaces, balanced lighting, and responsible water use create a kitchen that feels modern, functional, and welcoming.

TYE Home Furnishing